Gelatin Plate Printing is fun and easy and doesn’t take any special tools. It’s a type of monoprinting, and each print will be different. The gelatin has an interesting texture that becomes more pronounced as the plate is used, and it starts cracking as it begins to break down. I’m a very tactile person, and love the way the gelatin plate feels under my hands as I’m pressing the fabric onto it. You can print onto paper or fabric. Here, I’m printing on commercial fabric that already has a design printed on it.
It’s easiest to print with paper or fabric that’s not too large, especially if placement of the print is important. But . . . . I like to print on large pieces of fabric. So, I don’t worry very much about the placement.

Materials:
- 4 packets of unflavored gelatin
- container for creating the gelatin plate
- measuring cup
- water
- spoon
- knife
- fabric: washed to remove any sizing
- paint palette
- brayer
- fabric paint
- objects such as doilies, stencils, or bubble wrap for creating designs on the gelatin plate
Making the Gelatin Plate
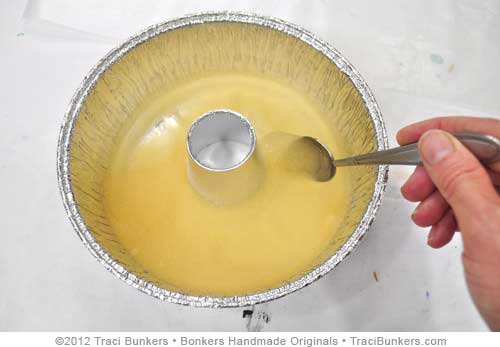
 Empty the 4 packets of gelatin into your container. I used an aluminum mini-bundt pan! Add 1 cup of cold water, and stir until everything is dissolved. It’ll be the consistency of applesauce.

Stir in 1 cup of boiling water, mixing thoroughly. It should look clear.

Place the container on a plate or cookie sheet to make it easier to carry without spilling. Then refrigerate until it’s solid (approximately 30 minutes).
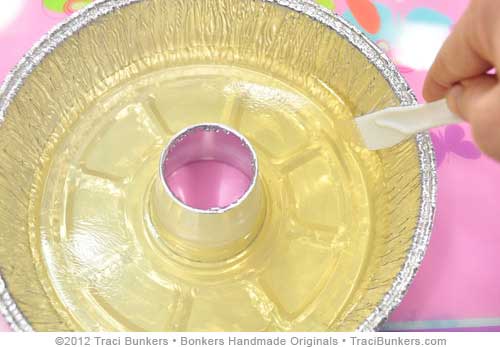
Insert the knife between the gelatin and mold, then move it around the edges to help release it. Place a plate or something on top of it, flip it over and remove the mold. Since my mold didn’t have a flat bottom, I flipped it over again so I could use the top, smooth surface.
Printing the First Layer

Put a small amount of fabric paint onto a paint palette (or, a plastic place mat like I’m using), and charge the brayer by rolling it over the paint.

Then roll the paint onto the gelatin plate.

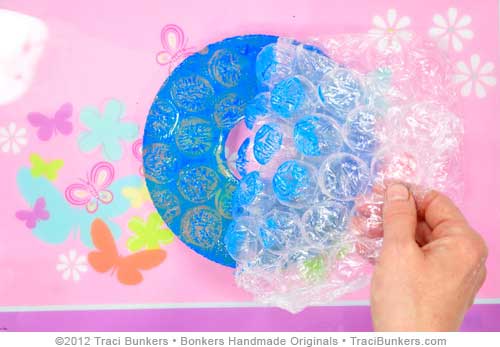
I’m pressing big bubble wrap onto the gelatin plate . . .

. . . then removing it, which removes some of the paint, creating a design.

Carefully place the fabric right-side down onto the gelatin plate. Press with your hands, moving them around without moving the fabric, to ensure the paint prints onto the fabric.

Peel the fabric off to see the print!

Since the bubble wrap has the paint on it from the gelatin plate, it can also be used to print with.

Here’s the fabric after the first layer of prints. I alternated the gelatin prints with the bubble wrap prints.
Printing the Second and Third Layers

Apply a different color of fabric paint onto the gelatin plate, then place an object that will work as a stencil on top of it. I used a crocheted doily.

With the stencil still on the gelatin plate, place the fabric right-side down onto it, then press on it to print. To make the printing placement easier, I folded the fabric. That’s why the right side is not only being printed on, but also showing.

After removing the fabric, remove the stencil. Since the plate is printed with the stencil on, and then the stencil is removed, it creates a “ghost” effect ready to print again.

After I printed the second layer in red, I printed a third layer with the doily in green. I only wanted to print the ghost layer on the cotton fabric, so I did the first step of the printing onto a piece of silk habotai fabric.

Then I printed the ghost print onto the cotton fabric.

This time, I was able to get two ghost prints. So after printing the first on the cotton fabric, I printed the second on the silk. Since the silk is fine fabric, it picks up the delicate second ghost print better than a coarser fabric would.

Here is the habotai silk fabric after several layers of printing, using the bubble wrap and the doily. Be sure the previous prints are dry before printing more layers.

And this is the cotton fabric.
I’m pretty happy with how both fabrics turned out. I might print more on them, or over-dye them after I heat set them. Be sure to follow the instructions for the fabric paint you are using. It might need to be heat set to make it permanent.

Here’s what the gelatin plate looked like after I was finished with my printing session. You can see that it was starting to get tears in it. You can also see hair on it–could be pet hair, could be fiber from my yarn or spinning fiber . . . But, I can still use it for a few days like this.
I have to admit. Part of the reason it already had a tear was because I played with it. Gelatin plates feel really cool! It’s hard NOT to play with them.
I hope you enjoyed my tutorial, and that it inspires you to try gelatin plate printing yourself. I suggest printing on small pieces of fabric or paper to get the hang of it. Maneuvering large pieces of fabric can be tricky.
Please check out the rest of the blog hop!
Here’s the whole list:
Art Sparks May Tutorial Blog Hop
- April 30, 2012 – Tracie Lyn Huskamp: Stenciled & Stitched Special Occasion Greeting Card
- May 1 – Traci Bunkers: Gelatin Plate Printing on Fabric
- May 2 – Lisa Engelbrecht: Script Lettering/Tattoo style using Sakura Calligrapher Pens
- May 3 – Judy Coates Perez: How Can You Resist Such a Simple Technique?
- May 4 – Melanie Testa: A Thimble Purse Pattern
- May 5 – Lyric Kinard: PSE for Thermofax Screen Printing
- May 6 – Jill Berry: The Layers of my Heart


I LOVE gelatin printing yet never thought to try it with a bundt pan. HOW FUN!
Your tutorial is so clear and enjoyable. This will definitely be one of my summer projects. Many days it is too hot to go outside during the summer and I look for projects like this. How long will the gelatin plate last?
I’ve never tried gelatin printing and your tutorial has me excited to start playing. Thanks for sharing!
Thanks for the tutorial. It looks really fun. I have been wanting to print some silk scarves. Now I know how!
GREAT tutorial Traci!
I have done gelatin printing – years ago and this has me EXCITED to try some more – THANKS!
What a great tutorial, Traci! Thanks. I’ve always wanted to try gelatin printing.
Hi Tracy,
Just want to say hi. I just started following your blog…your Art Journal book is enroute to me from Amazon as we speak. Looking forward to playing along with everything.
I’ve done gelatin printing on fabric, now will try again on paper.
Happy Day,
Connie
Thank you for sharing this great tutorial…very inspiring and fun.
I treated myself to a Gelli ready to go block before Christmas … you really make me wonder what I’m waiting for to give it a whirl 🙂
oxo
Thanks Traci this is great i have your book and have u on my google reader love your work…
hugz bev
Very descriptive– thanks so much! I tried using thickened proceon dyes. Then after the plate was past its prime, I remelted it in the warming oven & put it back in the fridge overnight. Looks okay to use again today. By the way, I already had an acrylic Gelli plate on which I used Permaset Aqua fabric screening inks with great success. But the thickened dyes seemed much harder to work with. Will try Permaset the next time.
Very nice tutorial… A truly inspiring piece of art!
Traci, Hi I just read your tutorial about gelli printing onto fabric. Can I do this with a t-shirt????
Thanks,
Tom