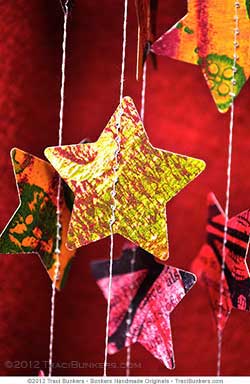
 Need a quick gift or holiday decoration? Here’s my tutorial on making a Star Garland, that I originally posted in December of 2012. I love the ones I made that I kept for myself, and thought this was the perfect time to share it again with you.
Materials
- light-weight decorative card stock
- paper cutter
- star paper punch (mine is a 1.5″ star)
- sewing machine
- thread
This can of course be made using plain card stock, but I think it’s more interesting to use something decorative. You can decorate the paper yourself first with paint, stamping or collage. But if you do that, be very careful that it’s not too thick since you’ll be sewing the paper with a sewing machine. Which brings up another point. I use an inexpensive sewing machine that’s a little work horse. I bought it so I wouldn’t have to worry about ruining it from sewing on paper and other stuff. So, be sure your machine will be okay with sewing on light-weight card stock.
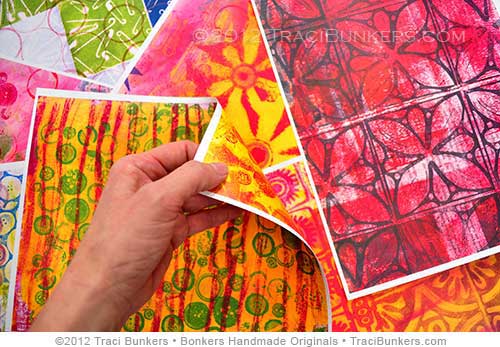
I made some collage sheets as digital downloads to use for this tutorial. You can buy them here in my shop (use promo code collage3 during checkout to get $.50 off each one when you buy 3 or more). I printed them on both sides of the paper, using a different design on each side. It’s easy to to do that–just flip the card stock over and run it through your printer again, printing on the other side.
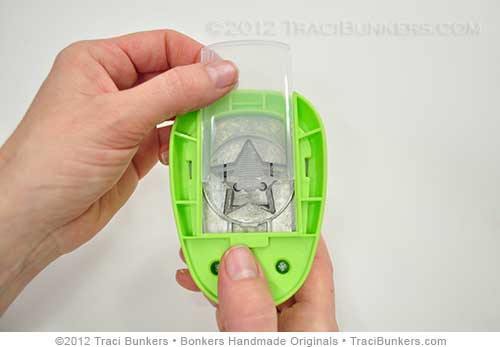
These can be made with any shape of a paper punch. Don’t use one too small or it will be hard to sew. I used a 1.5″ Star Punch from the Paper Studio. Flip the paper punch over and move the back cover up as far as it will go, or remove it if you can. This way as you punch, the shapes will fall out. Otherwise you’ll frequently have to slide the cover up and remove them.
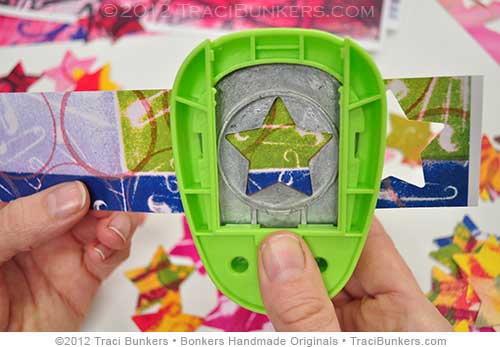
Cut your decorative card stock into strips that are big enough to punch the shape, but not so big you’ll waste a lot. With my 1.5″ star, I cut strips 1.75″ wide. Use the punch upside down so that you can see to position the paper, punching the shapes as close to each other as possible.

Here are the strips and punched out stars. The strips with the stars punched out can be used as stencils!

Put some thread in your machine for sewing. You can use fancy thread, but I use plain thread. Sewing on card stock can sometimes cause “issues,” where the thread underneath gets all jumbled up in a rat’s nest. So it’s better to use something that won’t cause even more issues. Sew on one of the punched card stock strips so that you can figure out the right tension for your sewing machine. You don’t want either thread to be too tight.
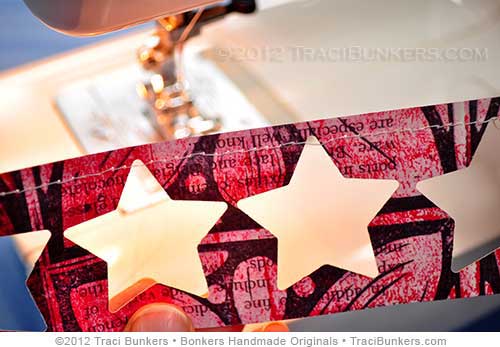
After making a few adjustments, I got the tension just right.
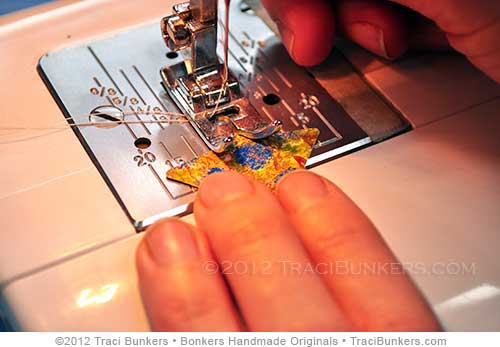
Pull both top & bottom thread out a little, then put the tip of a star under the presser foot, positioning it so that the needle will go through it. Then lower the foot.

Start sewing slowly across the star. I guide it with one hand, and gently pull the thread tails. You need to pull the thread tails because the star is small, so it helps guide it more. My Mom would cringe if she saw this. She always got after me when I would pull the fabric through while I was sewing. (Sorry Mom, but you kind of have to in this situation.)

After you sew from the tip to the “crotch” of one star, sew a little without anything under the foot. Then start another star. You can do that without lifting the presser foot. The whole time you are sewing, you need to pull the thread tails or the thread between the stars to keep things moving along. But don’t go too fast. I have about 1.5″ between the stars.

Lather. Rinse. Repeat.

If you run out of thread, break it, the cat intervenes, or you get a rat’s nest underneath, don’t worry. Clip the threads close to the last star. Lift the presser foot and position that star underneath the foot so that the needle will hit the middle of the star. Then lower the foot and continue sewing. There is no need to sew back and forth to secure it like you do when sewing fabric.

After you sew a bunch of stars, you need to start wrapping the garland around something. Otherwise you’ll have a tangled mess. I happened to have a roll of toilet paper within reach. You can make the garland as long as you want. And if you change your mind, you can always add to it later. I used about 5 stars per foot (12″), with about 1.5″ between each star.

Now it’s ready to hang where ever you want. I never have room for a Christmas tree, so I hang them on large plants, around doorways or book shelves, or in a corner.

They also make nice little gifts! Wrap the garland around some card stock, then put it into a clear envelope to look nice. When you wrap it around card stock, you might have to fudge in places, leaving some slack or adjusting it so that a star isn’t bent trying to wrap around to the other side.
I hope you enjoyed this tutorial. The star garland is fun to make. You can include children by having them punch out the stars, and hand them to you as you sew.
Want more? You can check out my other tutorials here.
Happy Holidays!
This post may contain some affiliate links. Read my disclosure policy here.

This is a great tutorial! I have a sewing machine that I bought back when I was trying to learn to sew. Alas, I found out that I dislike sewing (crochet, art journaling, and mail art are more my things). I think I’ll try this out, using a circle punch, just to put my machine to use.
Even if you didn’t like sewing, you might like sewing on paper. It can add a texture and look that you can’t get with other materials, such as pens and markers. Have fun!