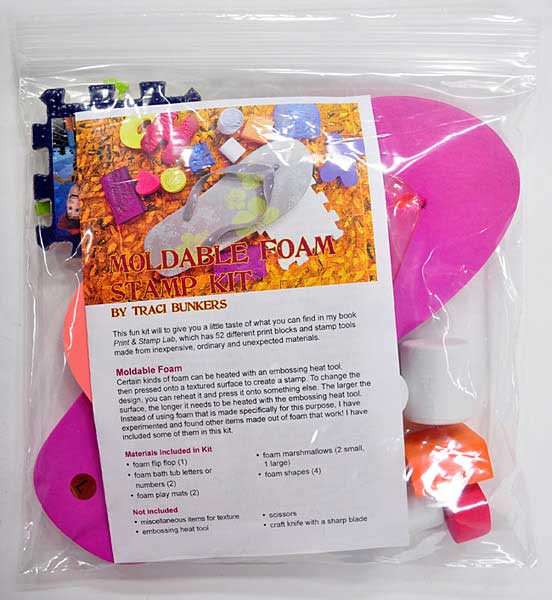
This tutorial will give you a little taste of what you can find in my book Print & Stamp Lab, which has 52 different print blocks and stamp tools made from inexpensive, ordinary and unexpected materials!
Moldable Foam
Certain kinds of foam can be heated with an embossing heat tool, then pressed onto a textured surface to create a stamp. To change the design, you can reheat it and press it onto something else. Instead of using foam that is made specifically for this purpose, I have experimented and found other items made out of foam that work! This is a simple & fun way to make your own stamps.
Wanna give it a try? I’ve made it super easy for you by making up kits!

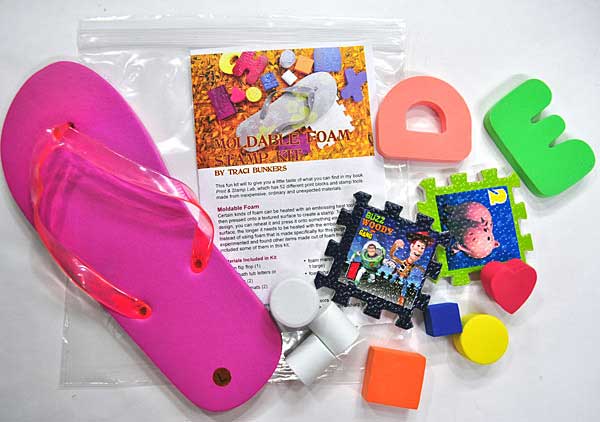
The kit includes:
- Full-color instructions with photographs
- foam flip flop (1)
- foam bath tub letters or numbers (2)
- foam play mats (2)
- foam marshmallows (2 small, 1 large)
- foam shapes (4)
(Note: the colors, letters or numbers, shapes, and printed designs of the foam included in your kit may vary from the photograph)
Materials not included that you will need:
- miscellaneous items for texture
- embossing heat tool
- scissors
- craft knife with a sharp blade
- steel ruler
- cutting mat
- stamp pad; or paint, paint palette & brayer
- paper or fabric
You can get the kit here.
I also have the rubber stamp molding mat available that I used in the video, called “Doodle Textures.”
You can get Doodle Textures here.

I hope you enjoyed this tutorial! Please check out my book Print & Stamp Lab for more techniques on making your own alternative printing & stamping tools!
This tutorial is part of the ArtSparks November Tutorial Blog Hop. Be sure to check them all out!
- Wednesday November 9th, Jane LaFazio: Sketch & Stitch Gift Bags
- November 10, Lyric Kinard: Glitter, Glisten, Glimmer: A Beaded Snowflake Ornament
- November 11, Tracie Lyn Huskamp: A Christmas Cardinal Ornament
- November 12, Melanie Testa
- November 13, Traci Bunkers: Moldable Foam Stamps
- November 14, Diana Trout: Japanese-Style Fabric Wrap (Furoshiko)
- November 15, Judy Coates Perez: Folk Art Inspired Ornament
- November 16, Kelli Perkins: Colorful Stitched Ornament
- November 17, Lisa Engelbrecht: Experimental lettering
- November 18, Jill Berry: Geo Papers and Projects
- November 19, Gloria Hansen: Resizing a digital image the easy way


Thank you for the tutorial. I will have to give it a try
Tracey!! You rock girl!! great tutorial and I love the touch of make-up you are wearing! you are so beautiful!!!I love your book and have it but I have not let myself play with making the moldable stamps yet- need to change that!! Leave it to you to use the skleey’s legs as forceps!! what a hoooTTT!!!!
This was great! I have the book and love it (there are so many ideas in it that never crossed my mind) but you make it so clear and simple. My kids just grew out of their flip-flops: time to make some holiday cards! Thanks for this, it was really well done and fun.
thanks for the video. Great ideas and cheap materials – love it! I’m just starting to make my own stamps. Haven’t seen a foam marshmallow before – love how it can be used twice! And of course, circles! {:-Deb
I have both your books … and LOVE them! I haven’t gotten through all 52 techniques of the Print and Stamp …YET. Need to get back to it!
I haven’t seen the marshmallows either … hmmm … time to go hunting!
Thanks so much for the video!
That’s cool! Shared the link to this lesson with my FB fan page 🙂
Those instructions are great. I found also good free guide about making own stamps here. it is described how to make polymer (not foam) stamps.
Awesome tutorial! I have one of the moldable foam stamps that is just waiting for me to play with it. Thanks for the ideas!
Your video was great. I am always looking for new background stamps; now I can experiment and make all sorts of new ones. Thanks!
thank you so much! that looks like a blast!! and your little skellie part was hilarious and delightful!!!! i shall check out your book next time i’m at the book store…
this is awesome, traci! you are the stamp queen!
Hi, Traci–
Your site and your video tutorials are great! I especially enjoyed the Intervention journal video. You’re truly a master of your craft!
I hate to admit it, but I hadn’t visited your website for quite some time. But I assure you, from now on I intend to become a much more frequent visitor.
Keep up the great work! Kudos!
‘tine
Fabulous, thank you so much for sharing this wonderful idea!
Who, but you, would have thought about a flip flop?! Great idea! I am going to try this with some foam too!
Thanks SO much for this awesome demo! FLIP FLOPS?!? *who’d a thunk it?* I have played with the PenScore foam, but have to order it – flip flops are an ideal alternative (not to mention, so much more affordable)! I have played with foam photo frames from the $1.00 bins at the craft store; and they work great, too!
p.s. – your book is on my Christmas wish list 😉 *but that seems oh, so long to wait!*
I have never stamped anything but a letter before and now I want to go out and make my own stamps! You make it seem so easy–can’t wait to try it now. Thanks for the great tutorial.
Traci! Your video was fantastic!!! Thank you! I loved the zipper stamp on fabric. You have made my Christmas want list easy – your book is on the top. Thanks again.
Love the tutorial! So far, I have only found small foam counting blocks at my local dollar store but will keep my eyes open for other foam. I made up 50 1 inch square stamps that my 6th grade son is selling at a little school market tomorrow as his own ‘business’!!! They turned out really cool! Kids toys have amazing textures!