I am one of the artist’s participating in the Crafter’s Workshop Spring 21012 Stencil Blog hop to promote Julie Fei-Fan Balzer’s Spring line of stencils. I chose to use the Pointy Circles stencil, and naturally wanted to use it on a journal page. I took pictures to show step-by-step not only how I used the stencil, but also how I created the journal spread from start to finish. So in a way, this is a mini-tutorial. Grab some tea–there are a lot of photos!
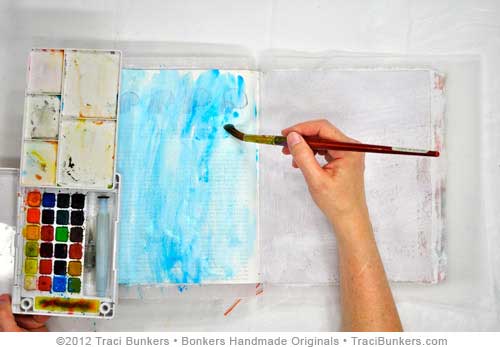
After applying a thin layer of gesso to my journal pages and drying it, I applied a watercolor wash using my Koi watercolor set. Instead of using the waterbrush that comes with it, I used a larger brush since I was applying color to the whole spread.
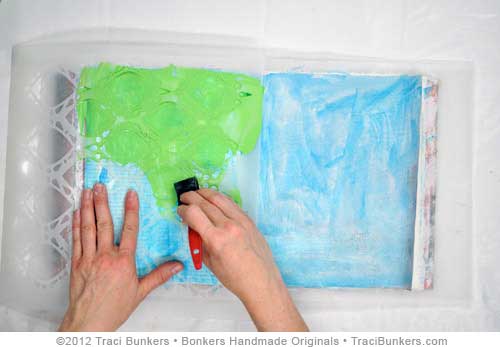
I dried the spread with a hair dryer, then I used a sponge brush to apply the paint by dragging it over the 12″ x 12″ Pointy Circles stencil.
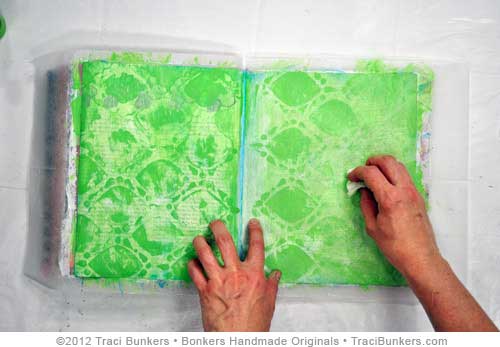
After stenciling the other page, I scrubbed around with a baby wipe to remove some of the paint and have a distressed look. I mainly did this because I had gotten too globby with the paint when I applied it.

The baby wipe removed most of the watercolor, so after I dried the spread, I applied a thin layer of blue acrylic paint.

I felt like I couldn’t see the stenciled design as well as I wanted to, so I re-stencilled with a stiff brush this time, using the same color of green paint.

Before I removed the stencil, I scrubbed around with a baby wipe because I didn’t want a solid look. I left the stencil on while I did this to keep from spreading paint into the other areas. That insured the design would be crisper, but still distressed somewhat.
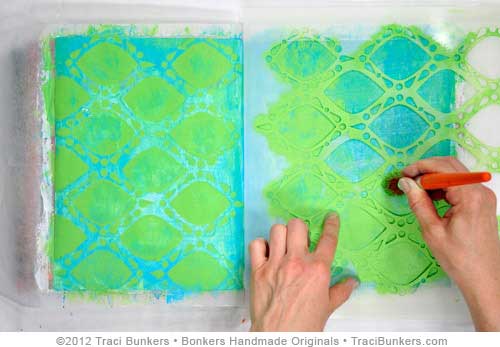
Then I stenciled the other side.

After drying the paint, I added some collage and a tape border using a metric ruler decorative tape. Then I stamped the large letters with my Pistolgrip alphabet stamps, did a little writing with a Pentel Pocket Brush Pen, then more stamping with my Labelmaker alphabet stamps.

Next, I used the line stamp from my Journaling stamp sheet to have lines for writing on. But first I placed a foam sheet under the page to help get a better impression with the stamp since it is big.

And then I did some writing.
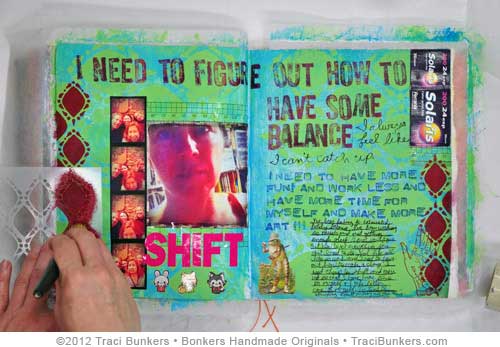
After I finished writing, I added some stickers, did a little more collage, and stamped the hand from my Astrology stamp sheet. Then I used the 6″ x 6″ Pointy Circles stencil to create a border.

After the paint was dry, I stamped near the stenciled borders with one of my stamps from my Doodles & Carvings stamp sheet, then I used some Portfolio Watersoluble Oil Pastels to add a little more color in places. Last but not least, I dated my spread with a date stamp, and I was finished!
Please check out my book “The Art Journal Workshop” for more in-depth info on art journaling, along with a lot of journaling exercises. I’m also one of the teachers in the group of online workshops, “21 Secrets,” that focuses on art journaling. Also, I have my own line of rubber stamps as well as other mixed-media supplies right here in my online shop. Check it out!
I hope you enjoyed seeing how I create a journal page, and how I used Julie Fei-Fan Balzer’s stencil that she designed for the Crafter’s Workshop. Please check out the other artist’s who are also using this stencil as part of the blog hop:
To see the WHOLE spring stencil blog hop, with artists using all of Julie’s stencils, go here. And, May 17th I’m in the blog hop again with a different stencil. For that, I’ll be doing something different besides a journal page.


Gorgeous page!
Really enjoyed seeing the layers build up 🙂 great page!
Loved seeing your process and how you used the stencil.
This is amazing!
Great post, Traci. Thanks for participating!!!
This article was really good. I loved your process, especially how you went over a part you did not care for to make it crisper. Loved the final page. Thanks for sharing.
This is my first visit to your site, but won’t be my last. Thanks for showing your how to.
What a beautiful page! It is so interesting to see how you do, step by step.Thanks for this great blog post!
I am so glad you are back Tracy!! I’ve missed you and your world. Great page!! thanks so much for the step by step – it’s wonderful to see and hear about your process.
sorry!! I spelled your name wrong Traci
Love the step by step photos.
I just love the colors and layers on your journal page. Thanks for the tutorial. Love the pic of you and your dog on the blog.
This is great! Love the step by step, and how you used both sizes. Really gorgeous!
Wow, you sure made me think of stencils in a different way!. Hope your kitty pal gets well soon. Thanks for the inspiration.
Gorgeous page! Loving the background and the colors are great! TFS
Thank you for the great post! love the details and your journal words….how they resonate with me at this point in Time. Great colors & design.
I LOVE how your page came together!!! and I also LOVE the way you used the stencil for your background and then popped it out with a great color for bordering!
The blue and green look so great together. I LOVE to see what artist do with these stencils. I’m just getting into them.
The stencil looks great as a background for your journal. I have never done that before.
I love seeing your process Traci! And what a gorgeous result! Thank you so much for being a part of the stencil hop!
Beautiful page! Love the colors.
Love the way you used the template! Awesome journal page!
Awesome job, love how you used the stencil….
This is fabulous. I love seeing how you put your pages together.